 Pin it
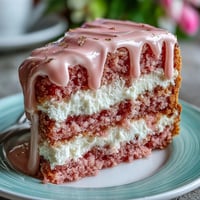
 There's something magical about watching a cake transform as it bakes—three separate batches of batter becoming something unified and stunning. I first attempted this spring ombre cake on a whim, inspired by the way sunlight filtered through my kitchen window one April morning, casting soft peachy tones across the counter. The idea of capturing that exact gradient in cake form felt like translating a moment into something you could actually eat. What started as an ambitious afternoon project turned into one of those rare cooking experiences where the vision matched the reality, and everyone who tasted it asked for the recipe before they'd even finished their slice.
I baked this for my sister's engagement brunch last year, and the most unexpected part wasn't the assembly—it was watching her friends take photos before eating, turning what I'd made into something that mattered beyond taste. One guest mentioned it reminded her of spring in a way that felt almost nostalgic, even though none of us had ever seen this exact cake before that morning. That's when I realized the real magic wasn't in perfecting the technique; it was in creating something that made people pause and notice the small beauty in front of them.
Ingredients
- All-purpose flour (3 cups): The foundation of your cake's structure—weigh it if you can, because spooning flour directly into the measuring cup compacts it and can throw off your ratios and make the cake dense.
- Baking powder (2½ tsp): Your leavening agent that creates those tender crumbs everyone loves; use fresh baking powder and store it in a cool, dry place because old powder loses its lift.
- Unsalted butter (1 cup for batter, 1½ cups for frosting): Room temperature is non-negotiable here—cold butter won't cream properly with sugar, and your batter becomes greasy and won't rise evenly.
- Granulated sugar (2 cups): Creates the structure and helps incorporate air into the batter when beaten with butter; this is why creaming time matters.
- Eggs (4 large, room temperature): Room temperature eggs emulsify smoothly into your batter instead of creating lumps; let them sit on the counter for 15 minutes before using.
- Pure vanilla extract (1 tbsp for cake, 2 tsp for frosting): Worth buying the real thing because it brings a subtle depth that imitation extract simply can't match in a delicate cake like this.
- Whole milk (1 cup, room temperature): Alternating it with flour keeps your batter from becoming tough; cold milk can seize the butter, so plan ahead.
- Gel food coloring (pink and yellow): Gel colors are concentrated, so a tiny dab goes a long way and won't thin out your batter the way liquid coloring does—crucial for maintaining that tender crumb.
- Powdered sugar (5 cups, sifted): Sifting removes lumps that would make your frosting grainy; don't skip this step even though it feels tedious.
- Milk or heavy cream (3–4 tbsp for frosting): Adjusts frosting consistency to spreadable perfection; add drop by drop once you reach the fluffy stage.
Tired of Takeout? 🥡
Get 10 meals you can make faster than delivery arrives. Seriously.
One email. No spam. Unsubscribe anytime.
Instructions
- Prepare Your Pans and Preheat:
- Set your oven to 350°F and take a moment to grease and line three 8-inch round pans—the parchment paper is your secret to releasing these delicate cakes without frustration. This step takes five minutes but saves you the heartbreak of a cake sticking.
- Dry Ingredients Ready:
- Whisk flour, baking powder, and salt in a bowl so the leavening distributes evenly; this simple step prevents dense pockets in your final cake. Set it aside and don't second-guess yourself here.
- Cream Butter and Sugar:
- Beat butter and sugar together for 3–4 minutes on medium speed until the mixture is pale, fluffy, and almost mousse-like in texture. You'll know it's ready when it looks like wet sand that's been whipped into clouds—this is where your cake gets its tender structure, so don't rush it.
- Add Eggs Gradually:
- Add one egg at a time, beating well after each addition so everything emulsifies smoothly instead of splitting. This patience prevents a grainy batter that bakes up tough.
- Alternate Dry and Wet:
- Begin and end with the flour mixture, adding in three additions of flour alternating with two of milk; mix just until combined to avoid overworking the gluten. The moment you don't see streaks of flour anymore, stop—overmixing is the enemy of tender cake.
- Divide and Tint the Batter:
- Pour the batter into three equal bowls and use a tiny toothpick dab of gel coloring to tint one pale pink, another pale yellow, and leave the third plain or peachy. Start with less coloring than you think you need because the color deepens as you fold it in.
- Bake with Attention:
- Pour colored batters into prepared pans and bake for 22–26 minutes until a toothpick inserted in the center comes out clean or with just a few moist crumbs. Every oven runs differently, so start checking at 22 minutes rather than waiting until the full 26.
- Cool Patiently:
- Let cakes rest in the pans for 10 minutes before turning them onto wire racks to cool completely. Rushing this makes warm cakes crumble, and you need stable layers for assembly.
- Make Your Frosting:
- Beat softened butter until creamy, then gradually add sifted powdered sugar, vanilla, salt, and milk in small amounts; the gradual approach prevents a grainy texture. Beat until light and fluffy, about 3–4 minutes, adding more milk only if needed for spreadable consistency.
- Tint the Frosting:
- Divide frosting into three bowls and color to match your cake layers—pale pink, pale yellow, and plain. Use the same restraint with coloring that you did with the batter.
- Layer with Intention:
- On your serving plate, place the yellow cake layer first, spread with yellow frosting, then add the plain or peach layer with plain frosting, and top with pink cake. Level each layer with a serrated knife if they've domed slightly so your cake stands straight.
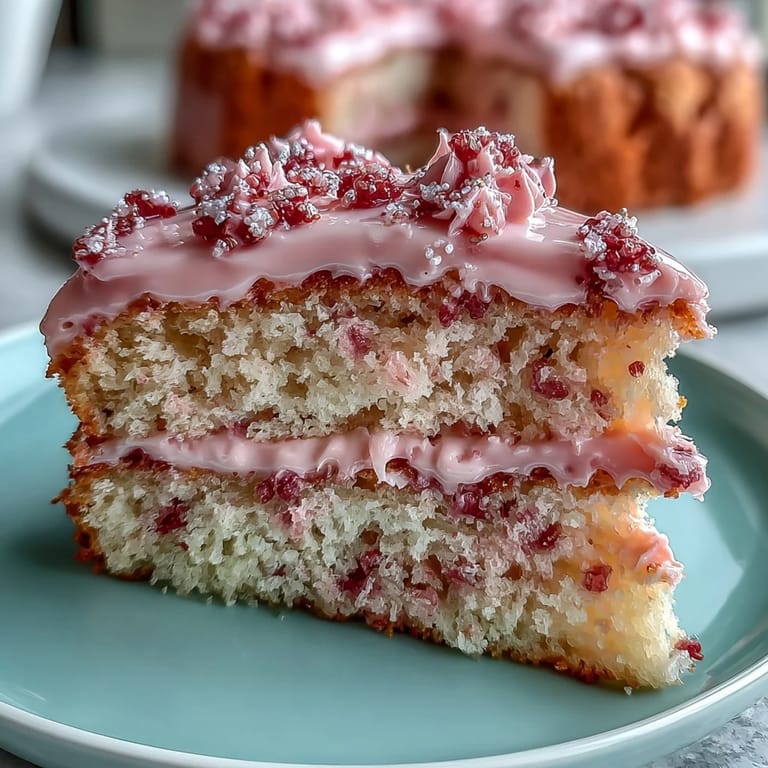
- Create the Ombre Effect:
- Use remaining frosting to blend the sides from yellow at the base to pink at the top, working in sections and using a cake scraper or offset spatula to smooth the gradient. This is the showstopping moment—take your time and enjoy watching the colors merge.
- Final Flourish:
- Decorate with pastel sprinkles, edible flowers, or fresh berries, then chill for 30 minutes so the frosting sets and slices cut cleanly. The chill time also lets flavors settle.
 Pin it
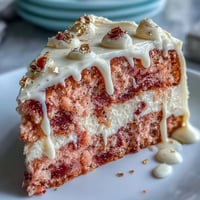
 The moment that made this recipe truly mine was when my neighbor, who'd watched me carry the finished cake to a friend's house, asked if I could teach her to make it. We spent an afternoon in her kitchen, and I realized that recipes aren't just instructions—they're invitations to share something that brings people joy. Watching her face light up when the ombre gradient came together exactly as she'd imagined made me understand why this cake mattered beyond appearance.
When to Serve This Cake
Spring celebrations are obvious, but I've learned this cake works beautifully year-round whenever you want to create a moment that feels special without being heavy or overly formal. Easter brunches, bridal showers, milestone birthdays, or even a quiet Wednesday afternoon when you want to remind yourself that beauty can exist in your own kitchen. The pastel colors catch afternoon light in such a way that the cake becomes a centerpiece before anyone even tastes it. I've found that serving it slightly chilled brings out the delicate crumb structure and makes the frosting more manageable on the plate.
Troubleshooting the Ombre
The ombre effect intimidates people more than it should, and that's usually because they're expecting total perfection instead of something organic and beautiful. I've made this cake enough times to know that slight color variations read as intentional artistry rather than mistakes—in fact, some of my favorite versions had what I'd initially thought were imperfections. The key is trusting that blending frosting colors is more forgiving than you think, especially if you're using a cake scraper to smooth everything. If your gradient ends up less pronounced than you wanted, remember that it still tastes magnificent, and the visual element is really just the bonus that comes with practice.
Storage and Make-Ahead Tips
This cake actually improves slightly after a day because the flavors settle and the frosting firms up, making it easier to slice cleanly and serve. You can bake the layers a full day ahead, wrap them individually in plastic wrap, and store them at room temperature; frosting and assembling the next day means less stress on cake-day morning. If you're planning to decorate more than a few hours ahead, keep the assembled cake in the refrigerator because room temperature can soften the frosting, especially if your kitchen is warm.
- Covered at room temperature, this cake stays fresh for one day; refrigerated in an airtight container, it keeps beautifully for up to four days.
- The buttercream frosting can be made up to three days ahead and stored in the refrigerator; let it come to room temperature and re-beat it for a minute before using.
- Freeze unfrosted, cooled cake layers individually wrapped for up to three months, then thaw at room temperature before assembling and decorating.
 Pin it
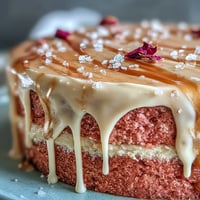
 Making this cake taught me that the most impressive dishes often come from simple techniques executed with care and a little creative vision. It's worth the time investment because the reward is a cake that tastes as beautiful as it looks.
Recipe Questions & Answers
- → How do I achieve the ombre effect with pastel colors?
Divide the batter into separate portions and tint each with varying amounts of pink and yellow gel food coloring to create soft gradient hues before baking.
- → What is the best way to frost for a smooth finish?
Use an offset spatula and cake scraper to evenly spread the buttercream and blend colors on the sides for a seamless gradient effect.
- → Can I prepare the cake layers in advance?
Yes, bake and cool the layers fully, then wrap them tightly and refrigerate until ready to assemble and frost.
- → How to prevent the layers from crumbling while assembling?
Ensure cakes are completely cooled before leveling and frosting; chilling the layers helps maintain structure during assembly.
- → Are there ingredient substitutions for a tangier flavor?
Replace whole milk with buttermilk to add a pleasant tang and enhance the sponge’s tenderness.